Diy Barn Door Bathroom Mirror
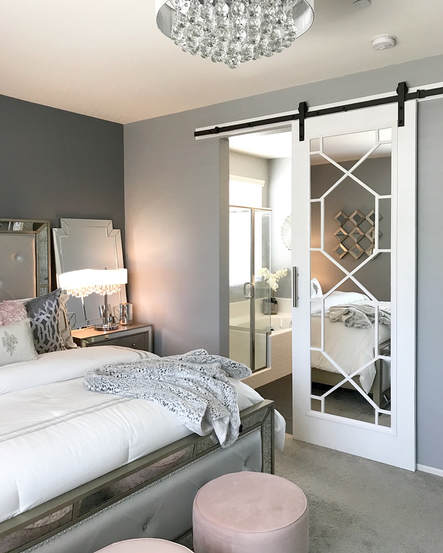
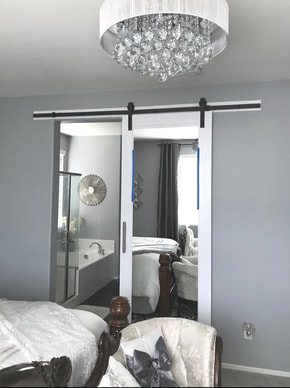
We finally completed the final touches on my DIY glam barn door and I couldn't be happier with the outcome. When I posted my progress of this project on my IG account, I received so many questions and comments that I thought it would be best to create a blog post that outlines the steps we took in creating this custom door. Hopefully this can serve as a guide for anyone who might be interested in doing something similar.
My Inspiration
While I love an open concept, I've never been a fan of having an open space between the master bedroom and bathroom. For one, there's no privacy when you are in the shower (if you have kids, this can become a huge problem 🙂 ) Secondly, although it's not super cold here that often, I hate taking a shower when it is cold and having no way to close off the bathroom only makes this situation worse. When considering a solution, I began contemplating the idea of installing a barn door, but when I started looking around, I couldn't really find anything that really caught my eye. Most of what I saw (that I could afford) was nice, but not exactly my style and I didn't want to compromise the look of the rest of my home. One day, when searching for inspiration online, I spotted this picture on Pinterest and although it's not exactly a barn door, the style is exactly what I wanted for my space (see picture below). This was when I got the idea to try to recreate this look with a custom DIY glam barn door (glam is the key word here). I presented this idea to my handyman dad who said he believed he would be able to help me bring this concept to life.
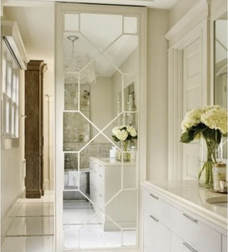
Image found on Pinterest
Step 1
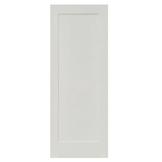
I measured my doorway and began looking for an interior door that would both fit in my space and work for creating this design. I knew I was looking for a style that would allow me to add a custom-sized mirror on the front. After sorting through multiple possibilities, I finally decided on the 36 in. x 96 in. Shaker 1-Panel Primed MDF Interior Door Slab from Home Depot (click here for the link to this door). This option was perfect for customizing according to what I had in mind.
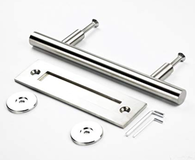
I also found the door handle I wanted to use in my design based on its look, size, and price. This handle is 12″ long and I really like the two-sided handle and pull style (click here for the link to this handle).
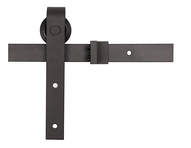
Purchasing the sliding track hardware was next. Based on my wall/doorway measurements, I decided on the U-MAX 8 FT Sliding Barn Wood Door Basic Sliding Track Hardware Kit (click here for the link to this kit).
Step 2
Once we received everything, we painted the door white (it comes primed) and we drilled holes to attach the hardware. A slit was also cut at the bottom of the door in order to use the floor glide that comes with the hardware kit (see pictures below). This keeps the door from swinging/hitting the wall when sliding it open and closed.
Step 3
Next, after cutting and painting a piece of plywood white, we fastened it to the wall behind the track in order for everything to be attached securely to the wall (we measured and cut the plywood to be the same length as the track). The track was then fastened on the piece of plywood above the doorway and the floor guide was also fastened to the floor with screws made for concrete. The track I used came in two pieces that fit together in the middle and was attached with 6 bolts. It was important to get the track hung very level so that the door wouldn't slide on its own when hanging on the track. The door was then hung on the sliding track.
Step 4
The next step was to order a custom-cut mirror that would fit within the inside of the door border. I checked with several different local glass shops and finally found one that offered installation for a reasonable price. The owner came within a couple days of ordering the mirror and installed it within minutes. He used a special mirror adhesive that is perfect for installing large mirrors. He recommended we let the mirror sit for 24 hours before removing the tape and cleaning it.
Step 5
I purchased 1 3/4″ trim from Home Depot to create a border around the mirror. The trim was cut and then glued along the edge of the mirror with Kwik Seal Plus.
Step 6 – The Tricky Part
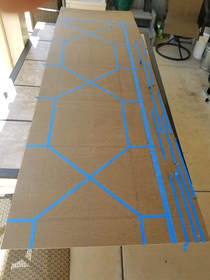
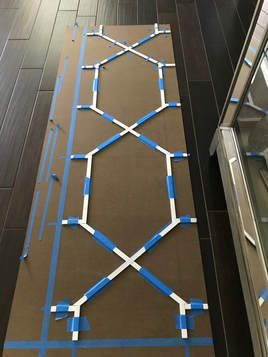
We knew the inside trim-work design would be the trickiest part. My dad decided it would be best to tape out the design I wanted onto a platform that was the same size as the mirrored part of my door (we remeasured the mirror dimensions within the border/trim once again just to be exact). The outline of the dimensions were taped off on the platform. Then, the figure 8 in the pattern was centered and outlined with tape. Finally, the rest of the pieces were taped accordingly (see picture below). This step took a lot of measuring and remeasuring to ensure everything would be symmetrical and centered appropriately. By the way, I give full credit to my dad here for coming up with this idea. Have I ever mentioned how awesome he is?:) Once the pattern was laid out, it made cutting the trim pieces a breeze.
After the taped outline was finished and looked good, the pieces of trim were cut to place over the tape. I decided to use a 3/4″ screen molding for the trim (from Home Depot) because I wanted something smooth and thin. Measure, cut, measure, cut, and on and on until all of the pieces were set. They were carefully taped onto the platform to hold them in place until we were ready to glue them on the mirror.
Step 7
The next step was to glue the trim on the front of the mirror. We used the Kwik Seal Plus again for this. Starting from the bottom to the top, each piece was carefully glued to the door. Tape was placed over each glued piece to prevent it from moving while the glue/seal was setting.
Step 8
The final step was to remove the tape, seal the cracks/joints, and use paint to touch up any necessary places. The mirror was then wiped off and cleaned with a soft microfiber cloth. I absolutely love the way it turned out!
If you decide to take on this DIY glam barn door project, please send me pics so I can share on my IG page! I love to see and share your work!

Source: https://www.designsbyjeana.com/my-diy-barn-door-html/


0 Komentar